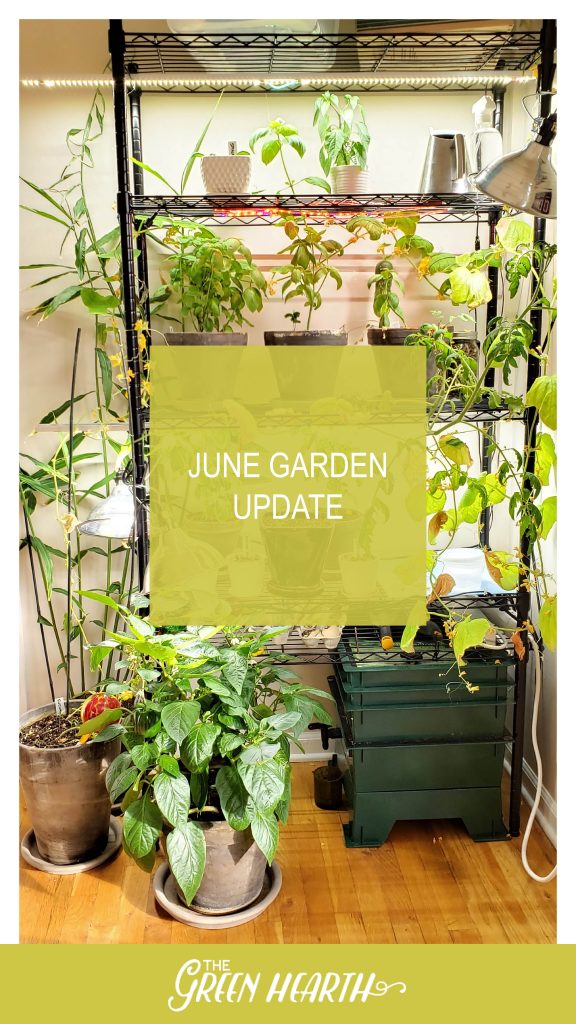
Another month, and I’m sad to report no official garden has been started yet at The Green Hearth. So, I wanted to take this month to share something I have been rather excited about ever since I befriended these little guys: compost worms.
Note: there are no affiliate links on this page
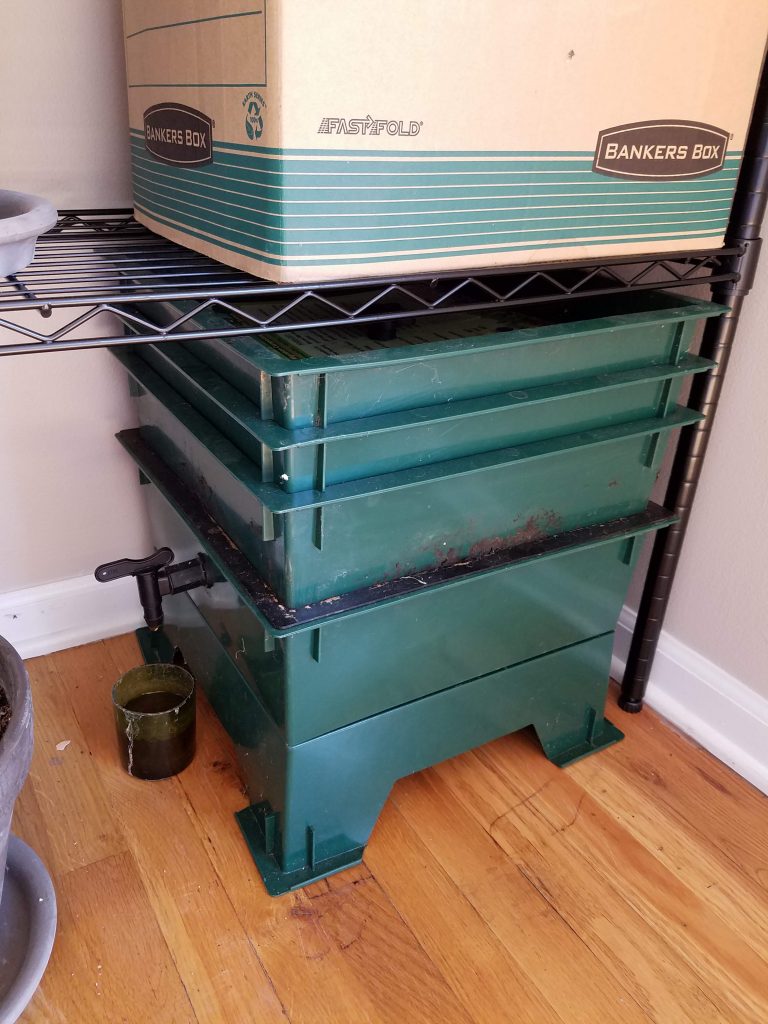
A few years ago, a good friend offered up her Worm Factory – a tray system for producing your own compost at home. Since the Mr. and I were living in a condo in Chicago, the size was perfect for our many indoor plants and we received huge benefits from caring for these guys. Since that time, I have managed to sneak the tray system over many state lines to where we are now, and they are still rocking their habitat in their new home. The benefit to this system is that I can keep the bins indoors without it producing any odors, or attract bugs (assuming you care for it correctly!). So, let’s take this moment to understand how this system works, before getting into the care for your own worms!
Multi-tray worm compost system methodology

The way these systems typically work is pretty simple. You have 3 trays, each with a “mesh” bottom and a collection basin at the very bottom. The top try is used to toss your food scraps and browns (more on what this means later). As new food is provideded the worms will migrate upwards – not to fead on the food itself, but the microbes feeding on the decaying food. (this is where that mesh system comes in handy as it allows the worms to easily pass between trays.) I will note, depending on what you put in to this tray, may lead to seeds sprouting out the top! It seems that every time we toss the innards of a speghetti squash, we end of with a small forest of seedlings sprouting (and yes, have managed to repot them to bloom).
The middle tray is simply a halfway point for the breakdown of the food. I commonly see food pieces still in chunks if I did not chop them fine enough, or if I left a large seed.
The third tray is compost gold – at least, that’s the intent. By this time, the floor in that tray should have decomposed for 3-9 months pending how ground up you make your food scraps and the number of worms in your bin. I am always surprised to find when the time comes to “harvest” my compost that any smell, would be an earthy smell! I will note, this system tends to leave this tray pretty moist for me. I’ve toured a local worm farm (yes, they are a thing, and SUPER fascinating!), and the method they use produced much dryer compost; even the worm compost you buy in the store will have their level of moisture, where mine does not. I have attempted a few methods to change this (like keeping the lid more open), but they have ended up causing food flies to enter the home – which defeats the purpose. Once you harvest this tray, you can clean it out then rotate the whole system so this is now on the top.
The very bottom basin is a collection of the liquids – or worm tea. With this trayed system, the intent is that all of the liquid gold, still filled with microbes, falls down and allows for you to pour it out. I will admit, tomatoes plants LOVE this stuff! I’ve actually read that this worm tea is like a shot of fertilizer and supper beneficial to fruiting plants – but my basil seemed to be a fan of it as well!
Does it work?
Technically yes. I can get worm tea, unless my bottom tray is so backed up it pushes my compost to the basin and clogs everything. My compost is wet, but that doesn’t mean I can’t use – I use it plenty! In fact, I like to add it to the mix of any new plants I plant.
What to feed your worms
Worms are pretty simple, they need two things: greens and browns.
Greens
Think of your “green” as anything that can/has photosynthesized and is realativily still alive. Plants are great. Old, wet lettuce that sat in the fridge for too long. Dead/dying flowers from a recent holiday. Pretty much a vegetarian meal is great for your worm bin
- Veggie
- Fruits
- Dying plants
- Coffee grounds
*keep in mind that foods with dressings or toppings is not good for your worms and/or can cause odors.
Caution – do not add: Although your worms may eat better than most people (I know sure do better than me!) they do have some greens to stay away from. Any hot or spicy foods, like onions or peppers, are a no go. These may injur your worms, and frankly, who likes the smell of a rotting onion?
Browns
Browns are any plant that has been dead for sometime. These include:
- Paper (newspaper, junk mail, shredded, toilet paper rolls)
- Cardboard
- Eggshells (I will note than my eggshells have clogged my faucet for my worm tea in the past, now I use it for other things)
- Pasta
Worm bin no-nos
We already know that worms can’t do certain foods, but it’s important to note that some items, like dairy and meat, are a no go for the odor they can produce while decomposing. Other no-nos include plastic – even from those clear screens in your junk mail envelope – this cannot be broken down and could take you months to pull out of your worm bin (trust me, I know)
Process
It’s all very simple. Throughout the week, I collect any scraps of foods that were no longer needed, or maybe fell on the floor. as a bonus, I will sometimes add in paper towels I only used to dry my hands, and even hair pulled from my brush. I tend to keep these the fridge or freezer during the week so the rotting food doesn’t attract bugs and flies and so far no one has mistaken the tub of “Red Vines” for something eatable!
Each weekend (or every other weekend) I pull out my tub, typically, Friday night, I will put out the tub and let it thaw so the food is ready the next morning. The first items to go in are the greens – all the good stuff in that bin. If I have a little, I will keep it to a corner; if I have more, I might fill half the tray. Could I give a whole layer, yes, but this allows the next step to be added more easily.
So, one reason I like to tell people a difference between greens and browns is partly because I use this separation in my bin. Since I don’t want to attract bugs, I use my brows as a protective layer to make the rotting food less desirable. Pending the dryness of the scraps and the amount of worm team I collect that morning, I will either dunk my paper (in this case shredded paper) in water and squeeze as much water out as I can before “fluffing” it on top, or, I will use a clean spray bottle to dowse the top.
Worm like moisture, but they do need oxygen, or they can drown.
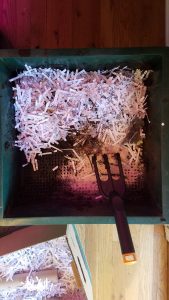
Layer of browns on top of scraps 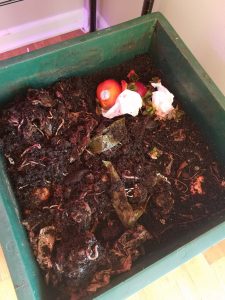
A shot of my middle tray 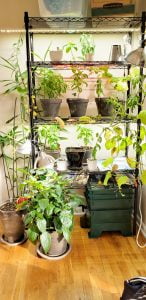
Our worm bin fit perfectly in our Chicago Condo with our herb shelf! 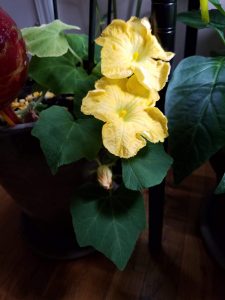
Blossoms from spaghetti squash that sprouted from the worm bin 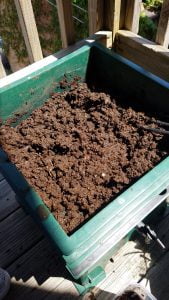
Look at that compost! 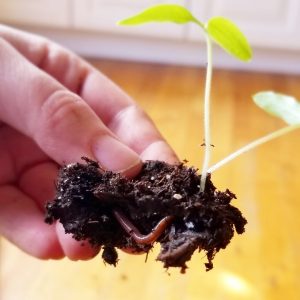
Repotting a seedling only to find a worm! 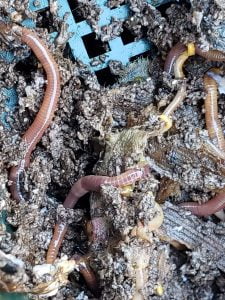
So what do you think? Would you give an indoor work bin composting system a try?